

As recently as last fall, I’d have told you I don’t really care for fried chicken.
It wasn’t so much that I disliked it, but rather I simply never felt it was worth the trouble. Certainly too much trouble to make at home. Even eating it out seemed more bothersome than it was worth, what with the greasy hands and bones and such. I recognized I was in the minority on this, but that’s just how it went.
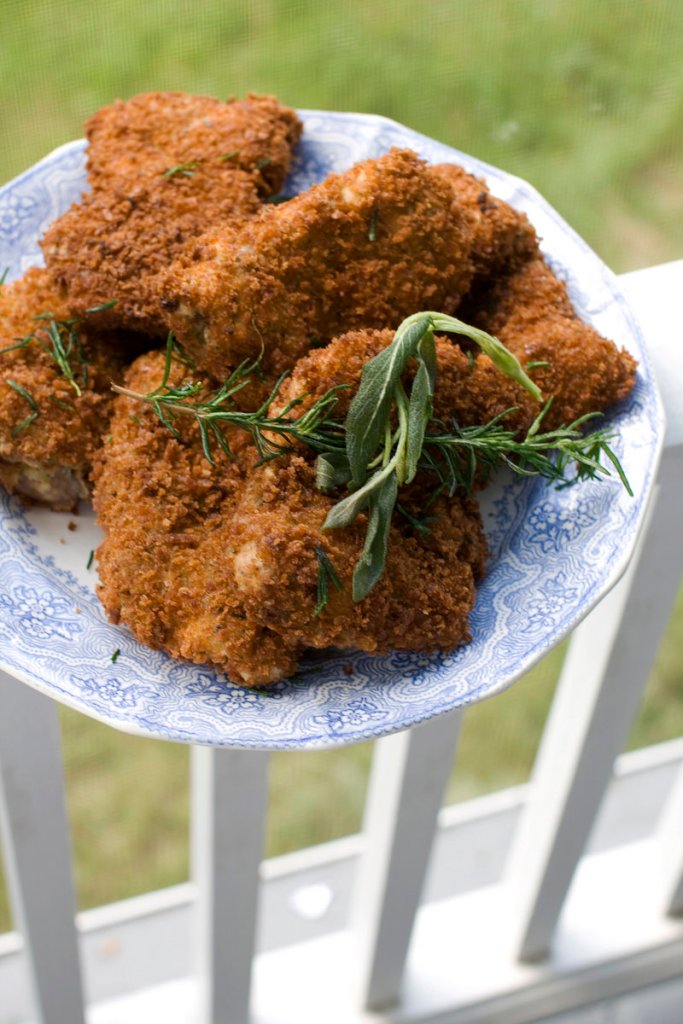
Additional Photos
Then last October I got to play Tyler Florence’s sous chef for a night. It was fun and delicious all around, but the transformative moment was when he fed me some of the fried chicken the rest of his team had been working on. I’d heard people rave about his fried chicken, a menu staple at his San Francisco restaurant, Wayfare Tavern. Nonetheless, I cautioned him that I didn’t like fried chicken.
Except it was wonderful. Rich with rosemary and sage and salt and pepper. Crisped to perfection, yet moist and tender inside.
Suffice to say, I’ve spent far too much time since that bite trying recreate some approximation of it at home. And with time and many, many attempts — as well as some tips from Florence — I finally created a fried chicken that was delicious and memorable and crave-worthy. It’s still a far cry from Florence’s version, but I think it is honest to the spirit of it.
But there was a problem. The recipe was almost impossible to share. You see, part of what makes Florence’s chicken so perfect is that he cooks the meat sous vide (basically a long, slow bath in moderately hot water) before it is deep-fried. I was actually so obsessed with this recipe that I enlisted my electrical engineer father to construct a sous vide cooker for me.
Trouble is, most people don’t have sous vide cookers. And most people retain enough of their sanity to not buy or build one just for a fried chicken recipe. Hence, the difficulty in sharing the recipe, which also happened to take roughly five hours to produce enough chicken for six people.
So I went back at it and tried to find a workaround that lets the home cook use a similar two-step cooking method without requiring any special equipment. The solution ended up being poaching the chicken. Not quite the same, but still pretty great. This method also allows you to prep the chicken right up through the breading stage, then refrigerate it for up to a day before flash frying just before serving.
One important caveat. Though inspired by Florence’s chicken, this is not his recipe. He helped me get the seasonings right, but it is by no means his. His is much better. But in the event you won’t be able to make it out to his restaurant any time soon, this is a great chicken to make for yourself at home.
THE BEST FRIED CHICKEN YOU’LL EVER EAT AT HOME
Start to finish: 1 hour
Servings: Four
For the poaching:
6 cups chicken broth
3 sprigs fresh rosemary, gently bruised
1 tablespoon lightly crushed black peppercorns
1/2 tablespoon kosher salt
3 pounds boneless, skinless chicken thighs
For the breading:
1 cup all-purpose flour
12 fresh sage leaves
2 large sprigs fresh rosemary leaves
1 teaspoon garlic powder
2 tablespoons chopped fresh thyme
2 teaspoons kosher salt
1/2 teaspoon ground black pepper
3 cups panko breadcrumbs
1 cup buttermilk
3 eggs, beaten with 1 tablespoon water
1 quart peanut oil
To poach the chicken, in a large saucepan combine the broth, rosemary, peppercorns and salt. Bring to a bare simmer, then add the chicken thighs. Return to a simmer, then cover and cook, adjusting the heat as needed to maintain just below a simmer, for 15 to 20 minutes, or until the meat reaches 165 F.
Meanwhile, prepare the breading. In a food processor, combine the flour, sage, rosemary, garlic powder, thyme, salt and pepper. Process until the seasonings are finely ground and mostly undetectable. Transfer the mixture to a gallon-size plastic bag. Place the panko in a second gallon-size plastic bag.
Once the chicken has finished poaching, transfer the thighs to a cutting board. Let cool until easily handled, then pat dry.
Place the buttermilk in a wide, shallow bowl and the beaten eggs in another similar bowl.
One at a time, soak each thigh briefly in the buttermilk then remove, shaking off any excess, and place in the bag with the flour mixture. Gently shake the bag to lightly coat the thigh. Remove the thigh from the flour mixture, then dredge though the eggs. Remove the thigh from the eggs, shaking off any excess, then place in the bag with the panko. Gently shake to coat. You may also need to pat the panko onto the meat.
Set the fully breaded chicken thigh on a rimmed baking sheet. Repeat with the remaining thighs. If toward the end your panko becomes too moist to coat the thighs, add a bit more to the bag.
Once all of the chicken is breaded, you can either proceed with the recipe and fry immediately, or cover the baking sheet with plastic wrap and refrigerate for up to 1 day.
When ready to fry, heat the oil in a large, deep saucepan over medium-high heat to 400 F. You will need a fry or instant thermometer to monitor the temperature. Also, heat the oven to 200 F.
Once the oil reaches temperature, carefully set 2 thighs into the oil at a time and cook, turning once, for 10 to 15 seconds, or until golden brown and crunchy. Use tongs or a slotted spoon to transfer the fried chicken to a clean rimmed baking sheet and set in the oven to keep warm. Allow the oil to return to 400 F, then continue cooking the chicken in batches.
J.M. Hirsch is the food editor for The Associated Press. He blogs at LunchBoxBlues.com and tweets at twitter.com/JM-Hirsch.
Send questions/comments to the editors.

Success. Please wait for the page to reload. If the page does not reload within 5 seconds, please refresh the page.
Enter your email and password to access comments.
Hi, to comment on stories you must . This profile is in addition to your subscription and website login.
Already have a commenting profile? .
Invalid username/password.
Please check your email to confirm and complete your registration.
Only subscribers are eligible to post comments. Please subscribe or login first for digital access. Here’s why.
Use the form below to reset your password. When you've submitted your account email, we will send an email with a reset code.