

For many parents, back to school time will mean back to packing lunch for the kids. So it’s a fine time to revisit that old lunchbox mainstay, the peanut butter sandwich.
The star ingredient tends to come one of two ways – heavily processed or ultra-natural. The more processed peanut butters generally are pumped up with added fats (as if peanuts don’t have enough!), sugar and salt. Not a happy choice. Meanwhile, natural peanut butters may shed the added ingredients, but they often make up for it with gains in price. Ouch!
I’ve decided there is a better way. Homemade! Do-it-yourself peanut butter is not only healthier (you control what goes in it), it’s also way cheaper. And it’s a snap to make.
You start with the recipe’s only required ingredient: peanuts, raw or toasted. I prefer using toasted peanuts. You can buy them toasted or get raw and toast them at home in the oven. Either way, you just pour the toasted peanuts into a processor or sturdy blender and let it rip until they’re ground.
The grinding involves two stages. First, the peanuts turn into a fine powder. If you keep going, they then turn into a smooth paste. Keep in mind that food processors and blenders tend to overheat if they’re forced to run for a long period. That’s why I prepare peanut butter in small batches, grinding only 11/2 cups of nuts at a time.
I also like to add 1 tablespoon of a neutral oil. My preference is grapeseed, but sunflower or safflower also work. The oil makes it easier to grind the nuts, which keeps both the machine and the nut butter from becoming too hot.
If you like your peanut butter chunky, start this recipe by pulsing about 1/3 cup of additional nuts in the processor. Once they’re nicely chopped, dump them out of the processor and set them aside. When the rest of the nuts have been ground to a paste, transfer to a bowl and stir in the chopped nuts.
Flavorings? You might add 1/4 teaspoon of fine salt in the beginning. Other options are vanilla extract or paste, honey, cinnamon or whatever suits your fancy. Just hold off on adding these until you’re otherwise finished processing. Once you have the consistency you want, then mix in any flavorings.
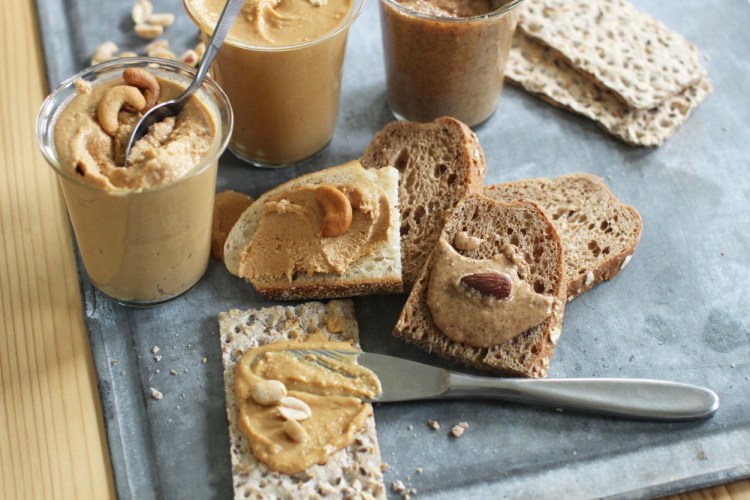
The beauty of this recipe? You don’t have to limit yourself to peanuts. Almonds and cashews work great, too. And whichever nut you use, your homemade nut butter will keep in a sealed jar in the refrigerator for up to three months. But I’m pretty sure it’ll be eaten well before then.
HOMEMADE NUT BUTTERS
Toasted peanuts, almonds and cashews taste best. If you buy them raw, they are easy to toast at home. Spread the nuts on a rimmed baking sheet lined with kitchen parchment and bake on the oven’s middle shelf at 350 F for 12 to 15 minutes, or until lightly browned and fragrant. For a lighter, smoother almond butter, look for blanched almonds, which lack the skin.
Makes about 1 cup
11/2 to 13/4 cups raw or toasted peanuts or cashews
1 tablespoon neutral vegetable oil, preferably grapeseed
1/4 teaspoon fine salt (optional)
In a food processor, combine the nuts, oil and salt, if using. Process until very smooth, scraping down the sides several times, 1 to 4 minutes. Transfer to a glass jar with a lid and chill until ready to use. The nut butters will keep for up to 3 months in the refrigerator.
Sara Moulton was executive chef at Gourmet magazine for nearly 25 years, and spent a decade hosting Food Network shows. She currently stars in public television’s “Sara’s Weeknight Meals” and has written three cookbooks, including “Sara Moulton’s Everyday Family Dinners.”
Send questions/comments to the editors.

Success. Please wait for the page to reload. If the page does not reload within 5 seconds, please refresh the page.
Enter your email and password to access comments.
Hi, to comment on stories you must . This profile is in addition to your subscription and website login.
Already have a commenting profile? .
Invalid username/password.
Please check your email to confirm and complete your registration.
Only subscribers are eligible to post comments. Please subscribe or login first for digital access. Here’s why.
Use the form below to reset your password. When you've submitted your account email, we will send an email with a reset code.