

In 2008 my family and I were living in England. That year the British Department of Environment, Food and Rural Affairs reported that 32 percent of all bread purchased in the United Kingdom was chucked into the bin. Wasting of bread was not happening in my kitchen because that was also the year I mastered making bread crumbs out of necessity.
Many of my kids’ favorite American comfort foods – New Jersey-style Italian meatballs, breaded pork cutlets and Mommy’s version of chicken nuggets (no pink foam, folks) – all require bread crumbs. And the only commercial ones I could buy at local grocery stores were the unnatural color of Cheetos and cost almost $2 with the exchange rate we were enduring at the time.
Making bread crumbs is neither complicated nor time consuming. The harder part is establishing the mindset to grab the bread remnants when they are past the point when even the toaster can save them, but not yet rock hard or moldy. I throw heels of artisan loaves, end slices of store-bought ones and uneaten burger buns (my family goes through 6 of the 8 in the package, routinely) into one bag that I keep in the freezer.
When I have a spare moment, I spread these scraps out on the counter to thaw for about 30 minutes. Then I simply grate them, using crusts and all. I employ the grater blade on my food processor because it’s fast, and I typically grate up to 8 cups at a time. You can do it by hand on a box grater for smaller quantities – open-palmed if you want to save your knuckles and get every last bit of bread grated.
These are now technically “fresh” bread crumbs. In this most basic state, I put them back into the bag and back into the freezer. They thaw, spread out on a plate or baking sheet, in 15 minutes at room temperature when I need them for either sweet recipes like Veiled Country Lass or savory ones like cauliflower, pancetta and bread crumb pasta (find my recipe on Food52.com).
When a recipe calls for toasted crumbs, I take ¼ cup more of the fresh ones than the amount the recipe asks for (the volume shrinks as they dry) and toast them in a dry pan on the stovetop, which uses less energy than cranking up the oven. If you find you use toasted crumbs more often than fresh, toast a large batch and store them in a sealed container at room temperature; they’ll last about a month.
If the recipe requires seasoned crumbs, add things like crumbled dried oregano, marjoram and thyme, salt and maybe a shake of garlic or onion powder and let the mix sit for 20 minutes so the flavors mingle before proceeding with the recipe.
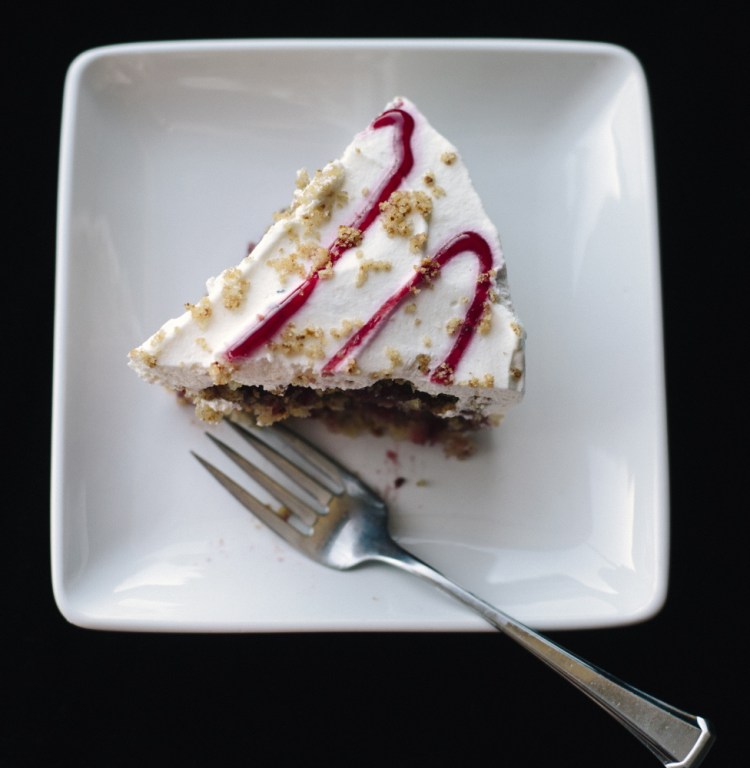
VEILED COUNTRY LASS
This recipe is an adaptation of one by Graham Kerr, an English cooking personality whose show “The Galloping Gourmet” aired on PBS in the 1960s. My English mother-in-law was a fan and served this dessert one of the first times I ate at her table. The recipe calls for white bread crumbs, but the dessert has roots in Scandinavia, where it’s called Peasant Girls in the Mist and uses dark rye bread crumbs. Maine farmer and cookbook writer Margaret Hathaway of Ten Apple Farm makes a version with challah, cocoa and apple brandy.
Serves 8
4 tablespoons unsalted butter, plus more to prepare the cake pan
7 cups fresh white bread crumbs
1/3 cup firmly packed light brown sugar
1/8 teaspoon ground cinnamon
2 cups applesauce
1 cup raspberry jam, plus 2 to 3 tablespoons for decorating
1 cup heavy cream
Preheat the oven to 350 degrees F.
Butter the bottom and sides of a 7-inch springform pan.
Melt butter over medium high heat in a large skillet. Add bread crumbs and brown sugar. Sauté until the bread crumbs are golden and crisp, 10 to 12 minutes, stirring periodically. Stir in the cinnamon.
Press a scant 2 cups of the crumbs into the bottom of the prepared cake pan. Spread 1 cup of applesauce on top of the crumbs and ½ cup of jam on top of the applesauce. Repeat the layering process one more time. End by spreading 1¾ cup of crumbs as the last layer. Reserve the remaining ¼ cup of seasoned crumbs for decoration.
Bake for 20 minutes. Remove cake from the oven and allow it to cool completely in the pan. Refrigerate for at least 2 hours. Run a knife around the inside circumference of the pan before trying to release the cake from the pan.
Whip the cream to stiff peaks and slather it on the cooled cake. Decorate with remaining bread crumbs and extra jam. Keep chilled for up to 3 hours before serving.
Christine Burns Rudalevige is a food writer, recipe developer and tester, and cooking teacher in Brunswick. She writes about feeding her family Maine seafood at www.familyfish.net. Contact her at cburns1227@gmail.com.
Send questions/comments to the editors.

Success. Please wait for the page to reload. If the page does not reload within 5 seconds, please refresh the page.
Enter your email and password to access comments.
Hi, to comment on stories you must . This profile is in addition to your subscription and website login.
Already have a commenting profile? .
Invalid username/password.
Please check your email to confirm and complete your registration.
Only subscribers are eligible to post comments. Please subscribe or login first for digital access. Here’s why.
Use the form below to reset your password. When you've submitted your account email, we will send an email with a reset code.