
If you’ve seen those fancy buches de noel – yule logs – in high-end food catalogs and neighborhood bake shops, you’ve probably fantasized about making one yourself.
But you never seem to get around to it, because it looks so… difficult.
All those cocoa-dusted meringue mushrooms seem so intimidating, even though they’re just egg whites and sugar. The marzipan decorations, the expertly rolled sponge cake – it’s enough to make you throw up your hands and reach for the Christmas cookie cutters instead.
After spending a recent morning watching chef Shanna O’Hea make her version of a buche de noel, I discovered that while there are one or two tricky steps in making one of these festive cakes, it’s the time required that is most challenging.
Most people are so strapped for time these days, they want everything they do in the kitchen to be as quick and easy as possible. This project isn’t quick, nor is it as easy as making a few dozen Santa-and-his-reindeer cookies.
But this is one of those holiday undertakings that is truly a labor of love. Think of it as a gift you give your family – or your guests, given that it will make a stunning centerpiece for your holiday party table. (And you can brag to all your friends that you did it yourself.)
The buche de noel is a classic French dessert inspired by the ancient tradition of throwing a yule log on the fire to welcome the return of the sun at the winter solstice. Folks in the Middle Ages believed that the ashes from this fire could ward off evil and help cure disease.
No one knows exactly when the idea for a cake that looks like a yule log tickled some French baker’s brain cells, but one story says it happened after Napoleon Bonaparte ordered Parisians to close their chimneys to keep out the cold that he believed caused illness. The buche de noel, the story goes, was created as a symbol of familial warmth, since people couldn’t actually gather around a warm hearth during the holidays.
In recent years, the cakes have grown in popularity, rivaling gingerbread houses as the go-to, showy holiday centerpiece. From the inexpensive yule logs at the grocery store to the fancy $85 buche de noel sold online by Williams-Sonoma, they seem to be everywhere.
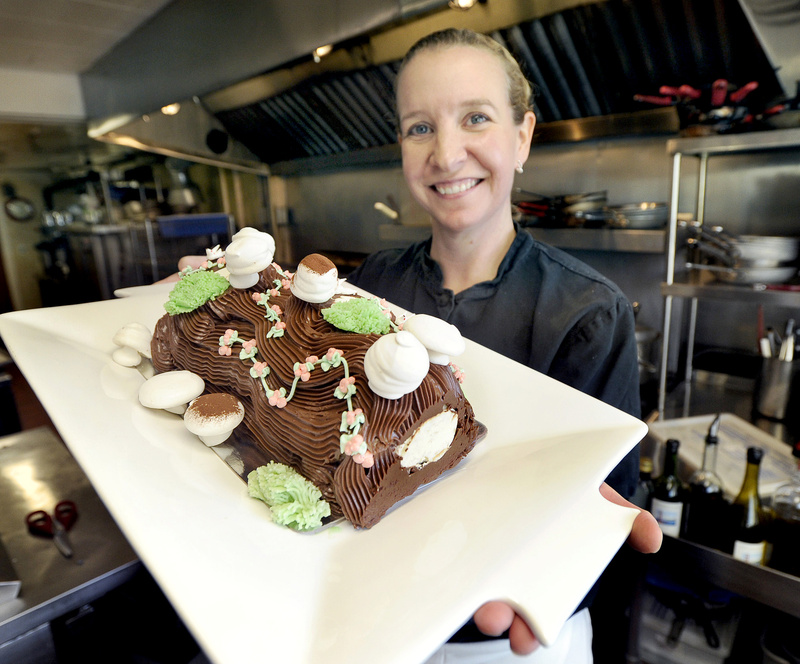
Shanna O’Hea owns the Kennebunk Inn and its restaurant, Academe, with her husband Brian. who’s also a chef. She learned how to make buche de noel from her mentor, Michel Boulard, a well-known private French chef in New York who used to work for the king of Belgium. Every year, Boulard still sends O’Hea a box filled with tiny little meringue birds to place on her cakes.
“When I first worked for Michel, which was 11 years ago now, I had never heard of it before,” O’Hea said. “He sort of started a Christmas tradition for us.”
During the Christmas season, O’Hea makes two or three buche de noel every week, and serves slices (with a scoop of ice cream) as a dessert special at Academe. She also takes custom orders for the cakes.
If you want to try making this symbol of the season yourself, O’Hea has graciously shared her recipe, and offers tips for getting it right. There is also a video online (www.pressherald.com/life/foodanddining) to help guide you.
Be brave. Go forth and bake. And have a joyeux noel.
THE MUSHROOMS
O’Hea estimates the entire buche de noel takes about five hours to make. But the mushrooms need to be completed 10 days to two weeks in advance so they can set properly.
The egg whites and sugar are whisked over a hot water bath until all the sugar melts. This is important, or your mushrooms will be grainy. And they will be eaten – O’Hea says kids love them.
“You don’t want to have any granulated sugar in there or when you eat the mushrooms when they’re dry, you’re going to taste it,” she said. “It’s not going to be a smooth meringue. So I periodically will stick my finger in the batch just to feel how it’s coming along.”
If you want to use a thermometer to gauge whether the egg-white mixture is ready for the mixer, look for it to reach a temperature of 120 to 130 degrees.
After the meringue is whisked in the mixer, it will look like marshmallow fluff.
O’Hea recommends using a medium or large pastry bag with a round tip to pipe the mushrooms onto a tray lined with parchment paper. Holding the bag in place, make the mushroom as big as you want, then give it a little swirl, as smoothly as you can, off the top. (See video for demonstration.) This will be the top of your mushroom.
For the bottoms, O’Hea said, “you want to do the same thing and then sort of pull upwards, basically like making a Hershey’s Kiss.”
Be sure you make as many bottoms as tops, and put some variety into your creations. Make some mushrooms big and fat, others small and dainty.
After you have “glued” the caps and stems together, turn them upside down on the tray until they have time to set.
O’Hea usually makes about 15 mushrooms per cake. She recommends letting them dry for 10 days to two weeks. If you have an oven with a pilot light, you can stick a tray of mushrooms in there for 24 hours to speed up the drying process.
To test if they are ready, try digging a hole in the bottom of one of the mushrooms with a toothpick. If the meringue is light and dry, you’ll be able to make a hole easily. If it is still wet, soft or tacky, continue to let them dry.
The cake itself can go into the refrigerator when you’re done – O’Hea says it will keep for as long as a month – but don’t decorate it until you’re ready to serve or display it in your home. The mushrooms (and any of the marzipan decorations) will “all turn into sugar” because of the humidity in the refrigerator. The marzipan gets tacky and wet looking, O’Hea said, and “the birds look like they’re crying.”
When O’Hea sells a whole cake, she always delivers the decorations separately to avoid this problem, and her customers get the fun of decorating the cake themselves.
THE MARZIPAN MOSS
Making the moss is a little like playing with Play-Doh.
Place the powdered sugar on some parchment paper when you mix it with the marzipan and the green food coloring so it will be less sticky. Wearing gloves helps too.
“You can either do it fresh if you want that chewy marzipan, which I kind of prefer, or you can let it dry out and be more crunchy,” O’Hea said.
O’Hea uses a spider strainer to make her moss, sprinkling a little powdered sugar on it first so the marzipan won’t stick. Any kind of mesh will do, as long as it’s not too small. “A chinois would be way too fine,” O’Hea said.
Be sure to make clumps of moss in varying sizes, like the mushrooms.
THE BUTTERCREAM FROSTING
The vanilla buttercream holds up beautifully, O’Hea says, so you can make it a little ahead and let it sit for a while at room temperature.
The chocolate buttercream is a little trickier, so O’Hea usually makes it by hand just before she uses it.
She lets the butter sit out overnight so it will be soft and easier to incorporate. For the chocolate, she chooses Callebaut, but any good-quality chocolate will do.
“I try to melt this (chocolate) a little bit ahead of time,” O’Hea said. “If you try mixing it in when the chocolate’s still hot, you can have problems of the butter melting too quickly. It’s a little bit of a finicky buttercream, which is why I like to do it by hand.”
Alternate adding a little bit of the butter, then a little of the cream. Try to keep it the same smooth, creamy consistency throughout this process.
ROLLING THE CAKE
Probably the second most scary thing about making a buche de noel is the idea of rolling the cake.
“You don’t want to try to do this with a cake you can’t roll,” O’Hea said, “because it’s just going to be a nightmare.”
One of the most important things to remember is to cool the cake on parchment paper so you can use the paper to help you roll the cake, and the cake will be easier to move to a serving platter when you’re ready. Even if you’re planning to do the whole assembly directly on a serving platter, use the parchment paper – you can trim the paper away later, after you’ve rolled and frosted the cake.
After trimming the edges of the cake, cut off a larger strip on the end, as the recipe instructs, and set it aside. Frost the cake with the chocolate buttercream, then place the reserved strip on the bottom of the cake, where you will be grabbing it with your hands to start rolling. The strip acts kind of like a structural support so the cake won’t fall apart when you start to roll it.
O’Hea says that when it comes to rolling – well, you just have to go for it. Kind of like jumping out of a plane, you don’t want to hesitate. Grab and roll, and don’t worry about the buttercream that squeezes out of the sides. When you’re done rolling, you can just scoop up that frosting and smear it back onto the cake.
Pipe the rest of the chocolate buttercream using a tip that is flat on one side and fluted on the other. Or take a star tip and squish it. Either method will give you the grainy look of a wood log.
Finish decorating with the small green vines and flowers, then put the log in the refrigerator so it can set.
When you’re ready, bring the yule log out, add the mushrooms and moss, and get ready to wow your guests.
Staff Writer Meredith Goad can be contacted at 791-6332 or at: [email protected]
Twitter: MeredithGoad
Comments are no longer available on this story